Inverno / Winter |
||
|
GALEGO |
ENGLISH |
|
|
O inverno é a época na que as
actividades de fora cesan e o labrego céntrase nas tarefas de dentro de
casa. Nesta época faise a matanza para aproveitar os produtos do porco
de cara ao inverno, faise a augardente e tamén actividades de reparación
de ferramentas dentro da casa. Fora da casa é a época de podar a viña e
os frutais. En canto aos cultivos, seméntanse os nabos, a única verdura
de inverno. |
In winter outdoor activities stop and the farmer concentrates on indoor activities such as the slaughtering of the pig, distilling spirits or repairing tools. Outside it is the time for pruning the vine and the fruitrees. In the garden, sowing turnips is the only planting activity. |
|
| A matanza | Pig Slaughtering | |
 |
Foto 1. O día anterior déixase o porco sen comer para que teña as tripas baleiras. O día da matanza sácase o porco do cocho e entre varias persoas, átase cunhas cordas para inmobilizalo. |
Picture 1. The previous day the pig is not given any food so its tripes are empty. The day of the slaughtering, the pig is taken out of the pigsty by several people, it is tied with ropes to immobilize it. |
 |
Foto 2. Cólgase o porco aínda vivo nunha guía para matalo. Unha vez que sobe á guía, tres persoas atan cordas ao porco para que non se abata e de seguido o matachín crávalle un coitelo na gorxa. |
Picture 2. The pig is immobilized with a rope and pushed against a bench or similar. Once it is on the bench, three people tie ropes so it doesn´t move and the slaughterer stabbs it with a knife in its throat. |
 |
Foto 3. Cando o porco comeza a botar o sangue, recóllese inmediatamente nun recipiente. Este sangue vaise utilizar para facer as morcillas. Mentres se recolle o sangue non se deixa de remexer para que non calle. |
Picture 3. When the pig starts to lose blood, this is collected in a bowl. This blood is going to be used to make blackpuddings. While the blood is being collected it is necessary to stir it so it does not clot. |
 |
Foto 4. |
Picture
4. Once the blood is collected, an onion is placed on the pig´s mouth so it remains open and all the blood and liquids can come out. |
 |
Foto 5. |
Picture
5. Now it is the time for singing. While the pig is still losing blood, it is covered with dry firs and straw. Then they are set on fire on top of the pig. The stab is closed with a corn ear so smoke does not get in. |
 |
Foto 6. Unha vez cuberto de fentos, préndese o lume, que se vai controlando para que chegue a todas as partes. Esto é para eliminar todos os xedas da pel. |
Picture 6. When the pig is totally covered with fir, the fire is lit and it is controlled so it reaches the whole body. This is to get rid of all the bristles. |
 |
Foto 7. Unha vez que se apaga o lume e o porco xa está chamuscado, ráspase cun coitelo afiado para quitarlle a sucidade máis gorda do lume e a cinza. |
Picture 7. When the fire goes out and the pig is singed, it must be scraped with a sharp knife in order to get rid of the filth and ashes. |
 |
Foto 8. Cun soprete, repásanse as zonas onde aínda quedan pelos. Na actualidade ás veces, chamúscase todo o porco co soprete en vez de lume. |
Picture 8. Using a blowlamp, the farmer goes over certain areas where there are still bristles. Nowadays in some cases the whole pig is singed with the blowlamp instead of fire. |
 |
Foto 9. Despois de chamuscalo, lévase a un sitio distinto mais limpo. Ponse nun banco, lávase e frégase cun cepillo para sacarlle todos os restos que puidesen quedar pegados á pel. |
Picture 9. After the singing, it is taken to a different and cleaner place. It is placed on a bench, it is washed again and scrubbed to eliminate all the filth that could be still left. |
 |
Foto 10. Unha vez limpo o porco, sóbese a un banco para manipulalo ben. |
Picture 10. Once the pig is clean, it is placed on a bench to make the following tasks easier. |
 |
Foto 11. Cun coitelo ben afiado quítaselle a papada, a continuación ábrese en canal dende a gorxa ata o ano e sácanselle do seu interior todas as vísceras. |
Picture 11. The chin is removed with a very sharp knife and then it is cut up from the throat to the anus and all the viscera are taken out. |
 |
Foto 12. Pola abertura comenza o destripe. Extráense todas as vísceras: fígado, corazón, riles, pulmóns e as tripas. |
Picture 12. The gutting is made through that cut. All viscera are removed: liver, heart, kidneys, lungs and tripes. |
 |
Foto 13. |
Picture 13. The viscera that are going to be eaten fresh are placed on a dish and the tripes in a basket. Tripes are going to be used to make chourizos after being washed thoroughly. |
 |
Foto 14. Despois de abrir e baleirar o porco, lávase para eliminar restos de sangue e outros líquidos. Logo, átaselle unha corda pola parte de atrás do pescozo para colgalo e que escorra o sangue que puidese quedar e maila auga do lavado. Queda así ata o día seguinte. |
Picture 14. After opening and emptiing the pig, it is washed again to get rid of the last blood and liquids. Then, a rope is tied around its neck and it is hanged to drain the blood or water. It stays like that until the next day. |
 |
Foto 15. |
Picture 15. The next day, the pig is cut in pieces that are going to be eaten fresh later or saltied. After some days it is the time to make "chourizos" and blackpuddings. |
| A augardente | "Augardente" | |
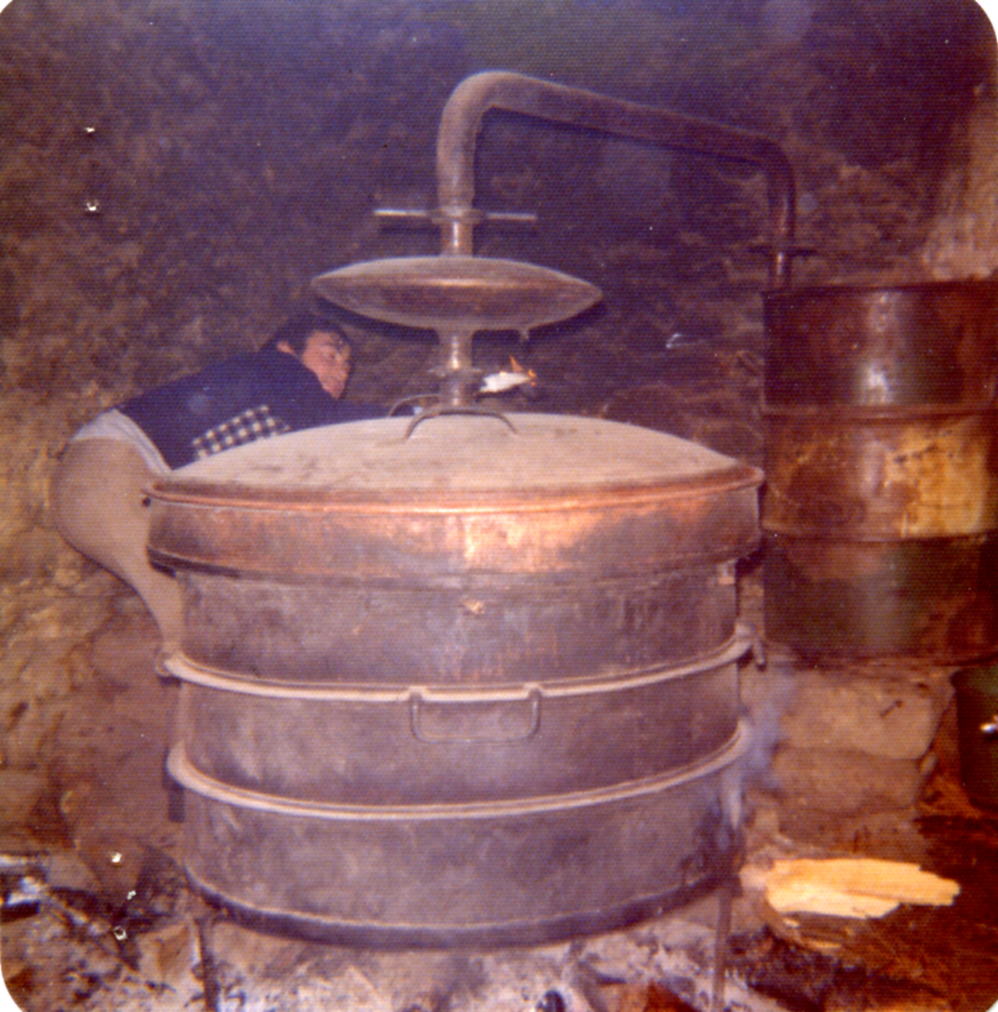 |
Foto 16.
Alambique. |
Picture
16. Alambic pot or still. The pot or still is used to distill a spirit called "augardente" (burning water). It is made of the skin of the grapes, the peels left after making wine. The "pan" is the bigger container, it has a pipe that goes to a condenser, the smaller recipient, that collects the distilling. Inside the condenser it is the serpentine. The condenser has to be full of cold water. |
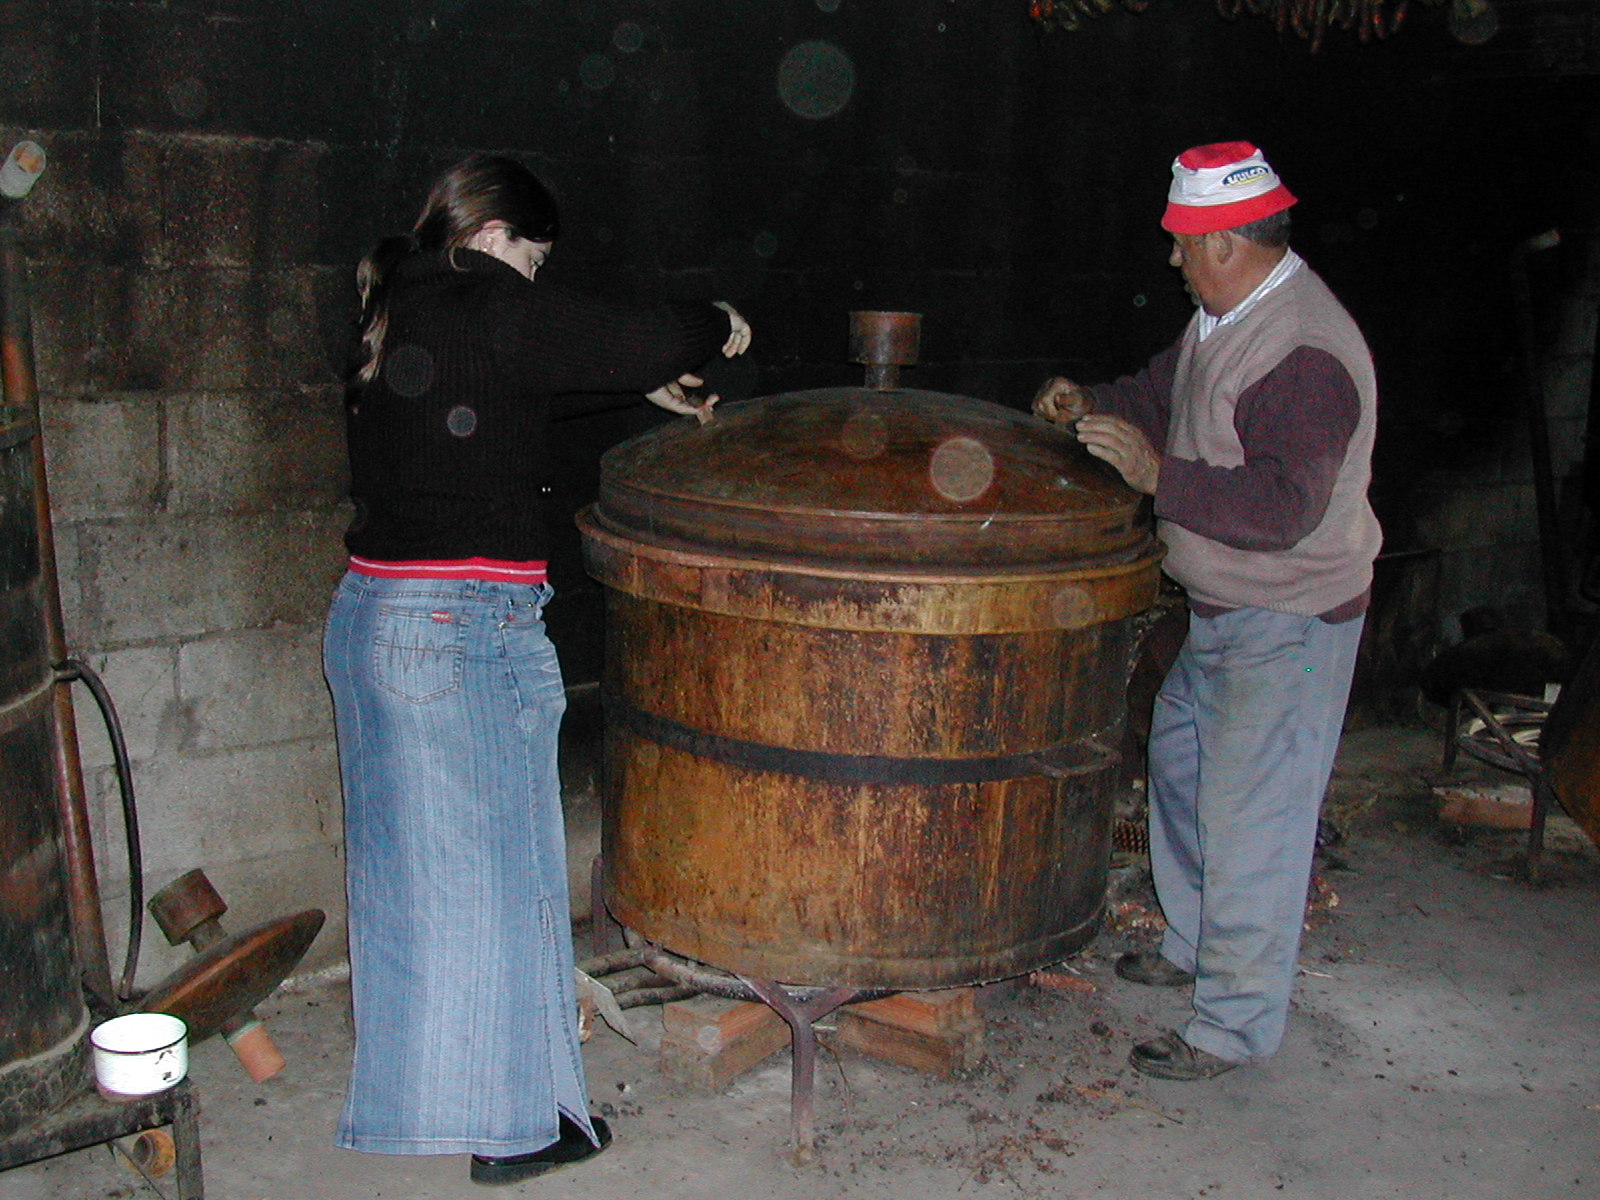 |
Foto 17. A pota. |
Picture 17. The pot. The pot is the bigger recipient. The grape skins are put inside and the pot is sealed. A fire is lit underneath until it starts to boil. When the fire is lower, alcohol starts to be distilled into "augardente" for around seven hours. |
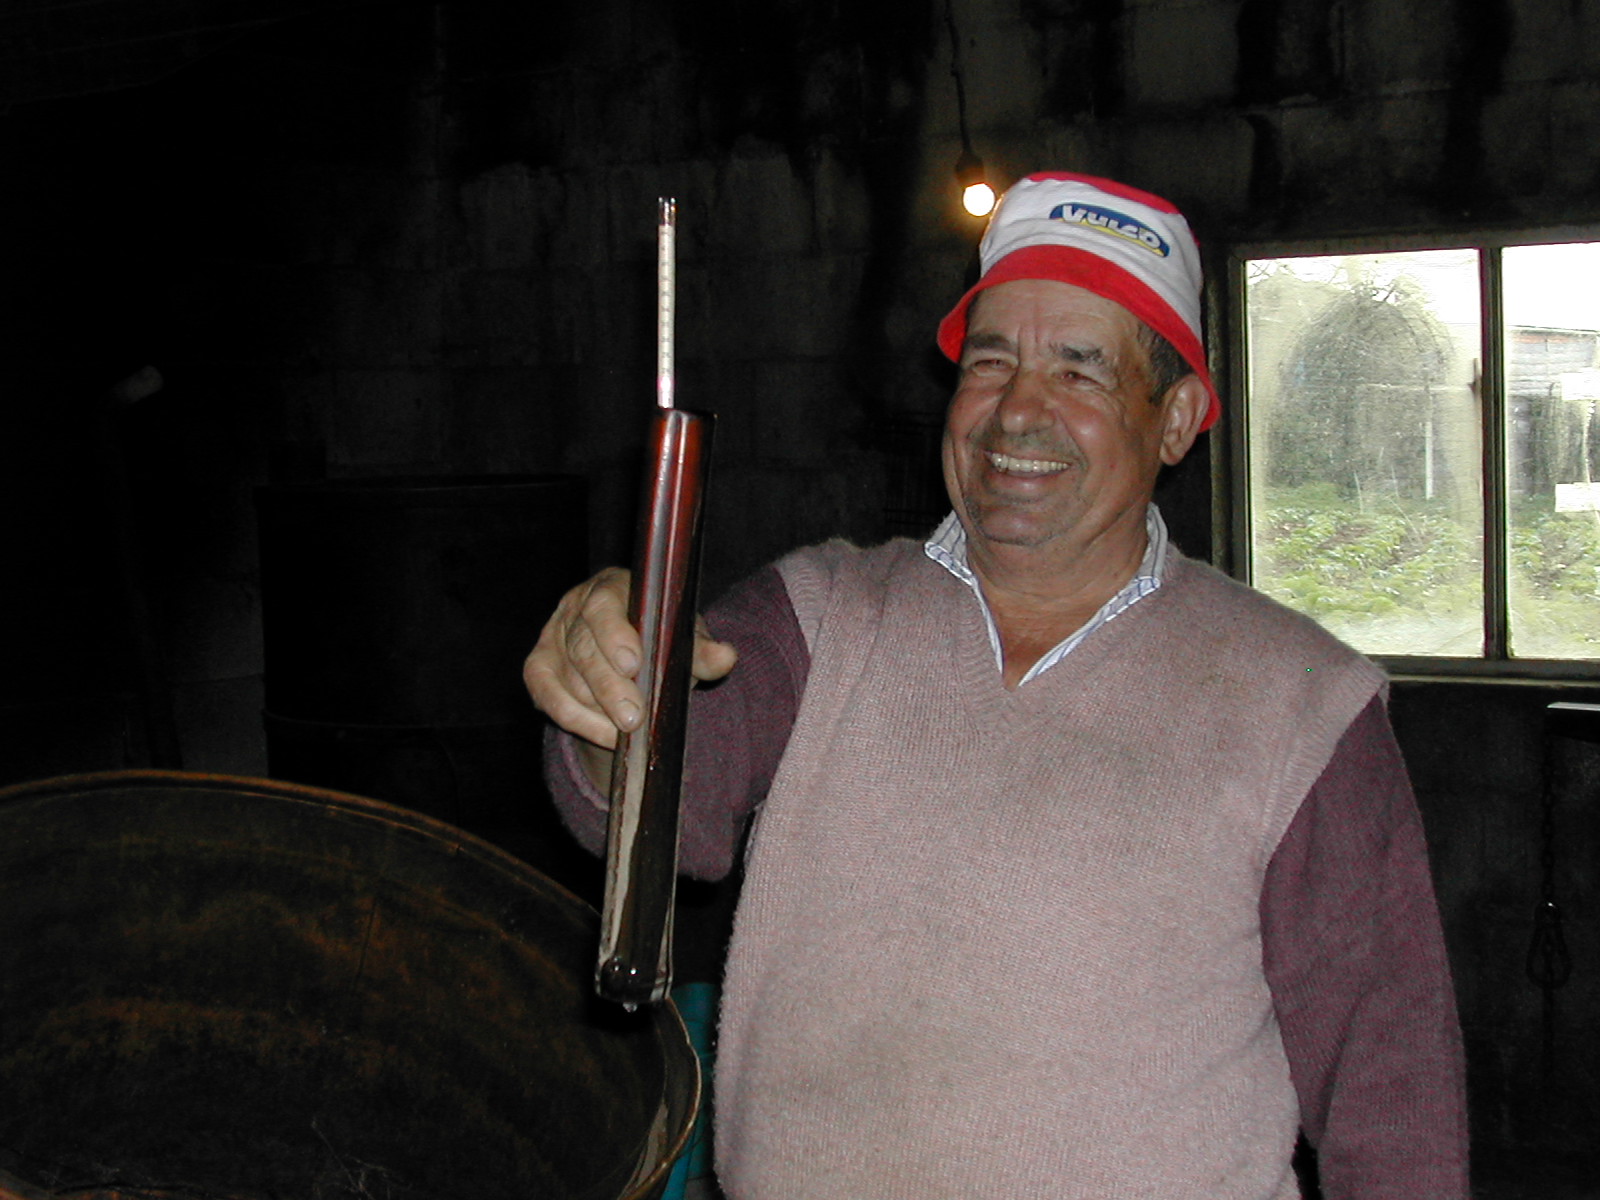 |
Foto 18. Augardenteiro. |
Picture 18. Augardente
maker. The augardente maker uses an alcoholimetre to control the level of alcohol. For augardente, it is usually 21 or 22º, that means 40 or 42º of similar spirits. |
 |
Foto 19. Destilación. |
Picture
19. Distillation. The augardente comes out through a tap and is collected in buckets. Then it is put into carafes. |
| A herba | Grass | |
 |
Foto 20. Collendo herba no carro. |
Picture 20. Gathering
grass on the cart. This is an all year round activity. In the old times the cart pulled by a team of cows was a basic element when harvesting grass. |
 |
Foto 21. Gadaña. A herba cortábase coa gadaña, xuntábase co angazo e botábase ao carro coa forcada. Se a cantidade era pequena segábase co fouciño e traíase para a casa nun feixe ou nunha cesta. |
Picture 21. Scythe. The grass was reaped with the scythe, gathered with a rake and put on the cart with a hay fork. If it was a small amount it was reaped with a sickle and was carried home in a bundle or in a basket. |
 |
Foto 22. Collendo herba co tractor. |
Picture 22. Gathering
grass with a tractor. Today carts have turned into tractors. Grass is reaped with machines and is collected automatically with a self loading tractor. |
 |
Foto 23. A segadora. |
Picture 23. The reaping
machine. The introduction of the reaping machine years ago made this task a lot easier. It can be used to reap fresh grass or hay. |
| A poda | Pruning | |
 |
Foto 24. Podando os frutais. O inverno é o momento da poda dos frutais de cara a mellorar a produción de froita no verán. |
Picture 24. Pruning
fruitrees. Winter is the time for pruning the fruitrees in order to improve the production of fruit in the summer. |
 |
Foto 25. A poda da viña. Tamén é o momento de podar a viña. O obxectivo é mellorar a produción e que os acios saian mestos e grandes. |
Picture 25. Pruning
the vine. It is also the time for pruning the vine. The aim is to improve the production and make the bunches thicker and bigger. |
  |
Foto 26. Vimbios. Tamén e necesario o atado da viña para que o vento non a afecte. O atado facíase con vimbios. |
Picture
26. Whips. Vine needs to be tied so wind does not affect it. It is tied with whips. |
| Os grelos | Turnips | |
 |
Foto 27. Grelos en flor. |
Picture 27. Turnips in
bloom. "Grelos" are the top leaves of the turnip. They are eaten as vegetables. Turnips are planted at the end of the summer to be eaten during all winter. |
 |
Foto 28. Grelos. |
Picture 28. "Grelos". The first buds of the turnip are called "nabizas" and they have a softer taste. The second shoots are called "grelos" and they are bitterer. The turnip is harvested to feed the cattle too. |
| Outonar | "Outonar" | |
 |
Foto 29. Carrexar o esterco. |
Picture 29. Carrying
manure. In winter it was time to fertilize the fields with manure so they were ready for spring. Manure was prepared with vegetal and animal organic material. Manure was carried to the fields in carts. |
 |
Foto 30. Montóns de esterco. |
Picture 30. Heaps of
manure. Manure was left in heaps all over the field and later was scattered. |
| Cestos | Baskets | |
 |
Foto 31. Vergas. Un dos labores máis común era facer cestos. Os cesteiros estaban especializados neste labor pero case sempre había laguén na casa que sabía facelos. O primeiro paso era atopar unha madeira axeitada, xeralmente de carballo ou castiñeiro sen moitos nós. Logo pasábase polo lume para quitarlle a casca. Logo co podón partíase ao longo e sacábanse as vergas ou tiras finas de madeira. |
Picture 31. Sticks. One of the most usual activities in winter was to make baskets. Basket makers were specialised in this task but there was always someone at home who knew how to make them. The first step was to find the suitable wood, usually oak or chestnut without knots. Then the wood was singed in order to remove the skin. After that, the sticks were cut with a small axe. |
 |
Foto 32. A base. |
Picture 32. The base. The sticks were arranged on a flat surface to make the base of the basket, in a circle or a rectangle. Then, the whips were braided in. |
 |
Foto 33. Os lados. |
Picture 33.The sides. When the base is finished, the sticks are turned up. The whips are braided in to the seleced level. |
 |
Foto 34. O remate. |
Picture 34. Finishing. Once the correct level was reached it had to be finished. This was done by making some cuts and fixing a chestnut stick all around and tying it up with whips. Every basket maker had its own style when doing this so baskets were easily distinguished. |
 |
Foto 34. A asa. |
Picture 35. The handle. The last part was adding the handle. This was done with a young chestnut stick that was stuck in the sides of the basket and fixed with nails. |
 |
Foto 35. Final. |
Picture 36. Done. Baskets were used in many activities: for wood, grape picking, clothes... |
| Ferramentas | Tools | |
 |
Foto 36. Loro. |
Picture
36. "Loro". Winter is the time to mend the tools. The "loro" is a part of the yoke. It connects the yoke to the cart, allowing a certain flexibility. It was usually made at home of a young oak stick. The stick should be around 5 cm thick and shouldn´t have knots. The wider end was shaped into a square so it could be fixed to the "twister". A clamp was added to make it stronger. |
 |
Foto 37. Enqueirado. Logo viña o enqueirado que consistía en poñer o pau ao lume para quitarlle a tona facilmente. |
Picture 37. Singing. After that the stick had to be singed so the bark could be easily peeled off. |
 |
Foto 38. Torcedeiro. |
Picture
38. "Twister". While the stick was still hot, it was set in the "torcedeiro" and was twisted around a pole. |
 |
Foto 39. Na viga. |
Picture 39. The beam. After that, it was fixed to a beam in a special shape with a bolt and it was left for a few days to dry. In the old times it was dipped in boiling fat to make it harder. |
 |
Foto 40. Retirar. |
Picture 40. Removal. After that, a slot was made in the wider end. The "loro" is unlocked carefully so it does not lose the shape. |
 |
Foto 41. O nó. |
Picture 41. The knot. The wider end is inserted in the slot of the cart and it is tied into a knot. The thinner end goes through the hole of the wider end. |
| Tecer o liño | Flax weaving | |
 |
Foto 42. Liño. |
Picture 42. Flax. Flax cultivation was very important as a source of vegetal fabric. It is harvested in July and August. Then the fibres had to be prepared. First the seeds had to be removed by passing it through a thin comb. Then it was gathered in bundles and was soaked in water for 40 days. After that, it was dried. Then it was hit and washed again. Then it was combed again so it got thinner. This process was made repeatedly until only the thinner fibres were left. |
 |
Foto 43. Tear. |
Picture 43. Loom. In the old times there was a loom in every house. The loom was used to weave flax and wool to make clothes for the family or sell them. This helped the household economy. |
 |
Foto 44. Fuso e rocas. |
Picture 44. Spindle and distaffs. The preparation of the flax was very complex. First you had to get the fibres, wash them and comb them until you got a flexible material. Then, these fibres were set in the distaff to be spinned, that is, to get suitable thread. |
 |
Foto 45. Debanando. |
Picture 45. Winding. Once it was spinned, you had to make the thread balls. |
 |
Foto 46. Tecendo. |
Picture 46. Weaving. Then, the warp or the base of threads where the fabric is woven, was strung. The warp was as wide as the fabric was supposed to and was tied up to the loom. |
 |
Foto 47. Tear. |
Picture 47. Loom. |
 |
Foto 48. Facendo o floco. O floco era un remate que adornaba as prendas polos bordes. |
Picture 48. Making the fringe. The fringe was a decoration that was sown to the clothes. |
 |
Foto 49.
Colcha. |
Picture 49. Bedspread. A loom could make bedspreads or linem to cut clothes out of it later. This bedspread is very colourful because it was for special ocasions. |
 |
Foto 50. Lenzo. |
Picture 50. Linen. |
| Tecer a lá | Wool weaving | |
 |
Foto 51. La de ovella. |
Picture 51. Wool. |
 |
Foto 52. Secando a la. |
Picture 52. Drying wool. |
 |
Foto 53. Espilir. |
Picture 53. Carding. Once it was dry, wool had to be carded, that is, combed with two brushes so it could be spinned later. |
 |
Foto 54. Fiando. |
Picture 54. Spinning. |
| Ferrando o cabalo | Horse shoeing | |
 |
Foto 55. Preparando as ferraduras. Os cabalos ferrábanse para que non gastasen o pezuño. |
Picture 55. Preparing the horse
shoes. |
 |
Foto 44. Ferrando. |
Picture 56. Shoeing a horse. |